


Cheapest Laptop In The World( 80$)

=>400Mhz ARM9 processor
=>Screen-size is 7 inches
=>Supports Wi-Fi, Ethernet Lan
=>2 USB ports.
=>128Mbytes of RAM
=>Pixel resolution: 480 x 234
=>2GB SSD storage
=>2,000mAh battery.
=>SD card slot capable of adding 32GB of flash storage
Certainly it has all basic features of a laptop! So you can call it like that!! Processor speed isn't impressive though but looking at the cost it is very much okay.If it launches in India surely its going to be hit because even a simple mobile phone with GPRS has about 80$!!
How to Change The Command Prompt Title

To Change it follow the given steps below. 1. Click Start >> Run >> type in “cmd” then press OK or ENTER until command prompt windows appear.2. Then type a command with a format like below and press ENTER “title the desired text” The Information :>>replaces the desired text with our own text, for example we can type as below: “title MYNAME” and press the enter button. 3. Make sure its result as below:
 Good luck friends....
Blue Screen Of Death [BSoD]
You certainly have felt this situation , atleast once in your life. This error usually occur when windows detects a problem on software , hardware or software driver where windows cannot continue the operations correctly.
Recognize BSOD
This BSOD is divided to 4 parts.
I. BugCheck information
Hexadecimal number together with “STOP” is called bug check code or stop code.. This is the important thing in BSOD.
Every code for bug checker has a symbolic name individual.
Example above DRIVER_IRQL_NOT_LESS_OR_EQUAL represents 0×000000D1
II. Recommended user action
Provides a list of proposal for the repair the error.
III. Drive Information
A part that detailed information about driver. If the hardware driver file or software listed in this blue screen liability it is a cause to BSoD.
IV. Debug port and status information
Operation system will try to save system memory even for the file that be found on hard drive or one of COM ports.
DSL Definition
DSL can operate in different frequency, so DSL can be used with common telephone line where both of the signals can be separated correctly. When both signal are separated, your telephone line will divided two parts.
I . Voice
II. Data
If this both signal are not separated correctly, telephone and also other hardware like modem and fax machine can interfere with the DSL line.
Splitter or Filter
To separates DSL and telephone signal, one tool called splitter will be used. Its will be installed on NID in telephone tools.
BIOS settings and configurations
Before changing any settings in the BIOS in your computer, you first need to write down all original values which are found in the settings and save them in a safe place because you maybe will need it again. It is a normal for the computer to "crash" when a setting in the BIOS is changed. However, for computers equipped with the new BIOS, this is not a problem because the user can choose the original setting or choose option "Load BIOS default" in the settings. This will cause the computer to use the original setting on minimum stage so that the computer can run / operate.
Most BIOS contains Utilities for hard disk "hard disk" which is called "Low Level Formatting." Most of the IDE / ATA or SCSI drivers which are paired on each computer after the year 1992 or after that will damage because of using this feature. This Utility are only created to work with MFM and RLL hard drive which are used in 1980 until 1992.
How to disable the USB port from registry
The USB Port can be disabled from registry as shown below:
I . Click start>Run>Type regedit>Click OK
II. In registry Editor Windows go to:
HKEY_LOCAL_MACHINE\SYSTEM\CurrentControlSet\Services\USBSTOR
III. Double click Dword Start (on the right) replace Data Value 3 to 4 then click OK – close registry editor windows. Now the USB function had been disabled
[Sometimes, You need to restart the computer to get the effect]
To restore the function of the USB repeat the steps above, and on the 3rd step just change the value from 4 to 3.
Hope you all give it a try.....
How to clean up Windows XP File Prefetch
Prefetch file which is on the Windows XP is a file that operates to speedup the loading process of programs which are frequently executed on windows and also functioned to speed the booting process of Windows XP. However, if this folder is overloaded then this matter can cause decrease in the performance of Windows XP. Besides that, to maintain the computer performance, we always clean up the files which are located on the C:\Windows\Prefetch\.
Actually, the task is simple but sometimes we are lazy or forgotten and then eventually the task is left undone and it causes a decreased computer performance.
Of course you don’t want this problem to occur…. So we can make an automatic program that run a "deleting the files of prefetch" operation automatically each times the computer is being shutdown.
If you’re interested, just follow the steps below:
1. Open your Notepad
2. Type this command: del C:\Windows\Prefetch\*.* /q
3. Save with extension name *.bat (prefetch.bat) on the directory which we need.
4. Open group policy editor (gpedit.msc) using Click Start >> Run >> Type in “gpedit.msc” and then press ENTER or OK and the group policy editor dialog box appears .
5. Click Computer Configuration\Windows Settings\Scripts (Startup/Shutdown)
6. On the column on the right side choose (Click double) on Shutdown until the windows come up like below:
 7. Click Add and then a windows will come up like the picture below:
  8. On the Script Name, click browse, then move to the folder or directory where we save the file which has been made of us recently.
9. If found the file, click Open then OK ("Scripts" Parameters just nil).
 10. Click Apply and then Ok.
Its done by now. Just restart the windows and then check it out on the directory C:\Windows\Prefetch\ and make sure all the files has been clean up.
Make your own Business card in MSWord
* Use ready-made business card templates from the Microsoft Office Online Templates Web site.
* Create your own business cards from scratch with the Envelopes and Labels dialog box.
I) Choose the right paper
You can either have a professional printer print your business cards or you can purchase paper and print them yourself at home. For home printing, Avery® is a popular do-it-yourself brand and provides standard business card paper: 2" X 3.5" cards on 8 1/2" X 11" heavyweight cardstock sheets. The tiny perforations in the sheets allow you to separate your business cards easily with professional results.
If you choose ready-made business cards from the the Microsoft Office Online Templates Web site, look for the Avery product number listed with the template. If you use the Envelope and Label feature in Word, the dialog box shows the product numbers for the Avery business card size you need.

Choose the business card paper you want from the Product number list. The Label information area to the right shows a description of each paper or label type you select.
II) Work with a ready-made template
If you start with a template to make your business cards, all you need to do is change the default text to match your company and contact information. In just a few minutes, you'll be ready to print your cards.
III) Work from scratch using the Envelopes and Labels dialog box
Using the Envelopes and Labels dialog box, you can either print directly or insert your business cards in a new document for later use.
To make and print your business cards
1. On the Tools menu, point to Letters and Mailings and then click Envelopes and Labels.
2. Click the Labels tab, and in the Address box, enter the company and contact information you want to display on your business card.
3. Right-click to show the shortcut menu, and then choose the formatting and alignment options you want.
4. Under Print, leave the default selected, Full page of the same label. This allows you to print multiple business cards on a perforated, heavyweight cardstock sheet by Avery.
5. Click Options, and under Printer information, choose the printer you want.
6. Under Label products, leave the default selected, Avery Standard.
7. Under Product number, choose the business card number you want, and then click OK. If the product number you want is not listed, one of the listed labels still may be the size paper you want.
8. In the Envelopes and Labels dialog box, do one of the following:
* To print one or more business cards, insert your sheet of Avery heavyweight cardstock into the printer and then click Print.
* To save your business card for later use, click New Document, and then click Save on the Standard toolbar.

1 Address box: Enter your contact information. Using the shortcut menu, you can format and align your text.
2 Print button: Click to print your business cards directly from this dialog box.
3 New Document button: Click to insert your business card information into a Word document for later use.
4 Options button: Click to choose the type and size of Avery paper for your business cards.
5 Label area: View the paper type and size based on your selection in the Label Options dialog box.
How to completely remove old softwares
Add Or Remove Programs.....???Not Enough
The easiest way to remove programs is from the Add Or Remove Programs applet. You simply select the program you wish to remove and click to remove it. This generally removes a majority of the application from your computer
However, a good portion of the time this method of removal does not remove every file that is related to the program. Often there will be scattered files, DLLs (dynamic link libraries), temporary files, and more that may be left on your computer. To ensure maximum optimization of your computer, as much of this clutter should be removed as possible.
Why are some files left behind?
When you install a program, the installer makes a log of all of the files it installs. when you remove the program, the uninstaller reads that log file and removes only the files listed. This sounds great, but if the uninstaller is flawed or the initial installation was inconsistent, the program can't be removed properly. If additional files have been added to the program's folders, those files and the folders they live in will not be removed either.
Where are files normally stored?
Many files are normally stored in you My Documents folder. Normally this folder is on the desktop of your computer or in your Start menu. Many of these files are created by programs for use by you. If you installed a trial of something and it creates a file or folder in you My Documents folder. That file or folder will not usually be removed when you uninstall the software.
Another place files are stored are in the temporary folders on your computer. In the old days of computing it was very easy to find and delete temporary files. However, today there are several different Temp folders:
C:Temp
C:WindowsTemp
C:Documents and SettingsYourNameLocal SettingsTemp
*Warning: It is not recommended to remove shared files. Deleting the wrong file while trying to free up some hard disk space could bring your system to a screeching halt.
Another place programs place data is in the Registry. The Registry is where most of the system information, preferences, and settings for your computer and software are stored. If software is removed improperly, information pertaining to the program will remain in the Registry. Removing these orphaned keys can make your system faster and more stable.
The registry is the favorite hiding place for spyware. Visit Secure Computer Networks for more information on spyware: http://www.securecomputernetworks.com/resources/security/spyware.htm
*Warning: Modifying the Registry could possibly crash your computer or software. Always remember to back your computer up before every changing anything Do not remove Registry entries for anything unless you are sure that they are not needed.
With a little detective work, you can find and remove unwanted files from your computer. You will end up with more free disk space and perhaps a more reliable and faster computer.
Of course, you must always be careful when removing files from your computer. If you mistakenly remove files that a program still uses, the program may not start again until you reinstall it. If you remove files that your operating system uses, you could potentially have a computer that will not start fully.
Secure Computer Networks has specialists on staff that can help you with this task. They have mobile techs located throughout Texas and also offer phone support provided by QUALIFIED technicians. A majority of the time after a Complete PC Clean-Up, your computer will run better, launch programs faster, crash less often, and receive fewer pop-ups while surfing the internet. Constant Pop-ups are a sign of a virus or spyware that has found it's way into your computer.
Article Source: http://www.kokkada.com
Secure Computer Networks has many valuable tips and tricks to help maintain and improve your computing experience. www.securecomputernetworks.com/resources/general-pc/clean-up-your-desktop.htm
Fix Task Manager wont open problem
 We can open Task manager by just clicking the combination: CTRL+ALT+Delete. Sometimes while you're trying do that, you can get following message: «taskmgr.exe – Unable to locate component. This application has failed to start because VDMDBG.dll was not found. Re-installing the application may fix this problem.
Problem can be some spyware or trojan you have on computer and it opens many ports. To be sure if that is the problem – try Active ports software. You can find it on http://www.protectme.com/freeware.html.
If you didn't find any malware software that way, then probably it's some system file mistake. Faster solution in that case is following. Start Command prompt (You can do that with Start – Run – cmd), and type: sfc/scan-now . Click ENTER. While doing that, Windows installation disk have to be in your Cd-rom. Procedure will take about 20-30 minutes. After scanning, restart your computer and try open Task manager again. It should open without problems.
How to make your own shorcuts in MSWord
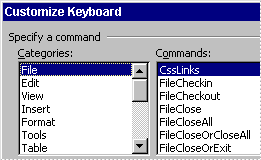
Like all other existing softwares, MSWord has also some built-in keyboard shortcuts. Beyond those pre-defined shortcuts, you can define your own in Microsoft Word. Here is the trick:
Open Tools > Customize and in new dialog click "Keyboard" . In new dialog click some category from "Categories" list. In "Commands" list chose some command. When you chose some command, in window bottom in "Description" field command description shows up. Chose command and click "Press new shortcut key" to activate. Then on keyboard click shortcut you want to add. If that keyboard combination already exist like some shortcut, you will be noticed, if it's free you will see "unassigned" notice. After that just click "Assign". 2 clicks on "Close".
If you done something wrong, don't worry. In dialog "Customize Keyboard" you have "Reset All" to back shortcuts on default.
How to Add characters in each cell of MS Excel
Option Explicit
Sub Add_A()
Dim Last, Z As Variant, X As Variant
Sheets("Sheet1").Select
{here add title of your sheet}
Last = ActiveCell.SpecialCells(xlLastCell).Address
ActiveSheet.Range(Cells(1, 1), Last).Select
Z = Selection.Address
{taking adress}
For Each X In ActiveSheet.Range(Z)
{working while...}
If Len(X) > 0 Then
{finding cell with content}
X.FormulaR1C1 = Chr(65) & X.Text
{65 is code for 'A'}
Else
X.FormulaR1C1 = ""
{change nothing if cell is empty }
End If
Next
End Sub
Save this like new Macro and run it. Macro "Add_A" will add "A" in front of cells content. You can change "A" with other characters to yield corresponding results.
How to delete/remove icons from Control Panel
I)Search for control.ini file.
II)In section [don't load] write what you don't want for Windows to load.
For instance, If you don't want QuickTime in Control Panel, in named section, just write
quicktime.cpl=no
Adding a new item to windows start menu
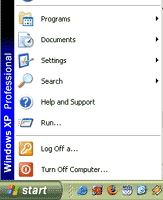
Here it is explained that how to add a new item(shortcut) to the windows start menu. Do right click on Start and than Open. You will see Programs folder. That is C:\Windows\StartMenu and there are shortcuts to programs you have in Windows Start menu. Right click there and New-Shortcut. Now you can browse and add some new document, shortcut to program, song, or whatever you want in Start menu. By New-folder, you can add new group, just like Programs group already exist. If you want to delete some shortcut you added, just delete it from that folder.
Windows Keyboard Shortcuts
*General Keyboard Shortcuts
CTRL+C (Copy)
CTRL+X (Cut)
CTRL+V (Paste)
CTRL+Z (Undo)
DELETE (Delete)
SHIFT+DELETE (Delete the selected item permanently without placing the item in the Recycle Bin)
CTRL while dragging an item (Copy the selected item)
CTRL+SHIFT while dragging an item (Create a shortcut to the selected item)
F2 key (Rename the selected item)
CTRL+RIGHT ARROW (Move the insertion point to the beginning of the next word)
CTRL+LEFT ARROW (Move the insertion point to the beginning of the previous word)
CTRL+DOWN ARROW (Move the insertion point to the beginning of the next paragraph)
CTRL+UP ARROW (Move the insertion point to the beginning of the previous paragraph)
CTRL+SHIFT with any of the arrow keys (Highlight a block of text)
SHIFT with any of the arrow keys (Select more than one item in a window or on the desktop, or select text in a document)
CTRL+A (Select all)
F3 key (Search for a file or a folder)
ALT+ENTER (View the properties for the selected item)
ALT+F4 (Close the active item, or quit the active program)
ALT+ENTER (Display the properties of the selected object)
ALT+SPACEBAR (Open the shortcut menu for the active window)
CTRL+F4 (Close the active document in programs that enable you to have multiple documents open simultaneously)
ALT+TAB (Switch between the open items)
ALT+ESC (Cycle through items in the order that they had been opened)
F6 key (Cycle through the screen elements in a window or on the desktop)
F4 key (Display the Address bar list in My Computer or Windows Explorer)
SHIFT+F10 (Display the shortcut menu for the selected item)
ALT+SPACEBAR (Display the System menu for the active window)
CTRL+ESC (Display the Start menu)
ALT+Underlined letter in a menu name (Display the corresponding menu)
Underlined letter in a command name on an open menu (Perform the corresponding command)
F10 key (Activate the menu bar in the active program)
RIGHT ARROW (Open the next menu to the right, or open a submenu)
LEFT ARROW (Open the next menu to the left, or close a submenu)
F5 key (Update the active window)
BACKSPACE (View the folder one level up in My Computer or Windows Explorer)
ESC (Cancel the current task)
SHIFT when you insert a CD-ROM into the CD-ROM drive (Prevent the CD-ROM from automatically playing)
*Dialogue Box Keyboard Shortcuts
CTRL+TAB (Move forward through the tabs)
CTRL+SHIFT+TAB (Move backward through the tabs)
TAB (Move forward through the options)
SHIFT+TAB (Move backward through the options)
ALT+Underlined letter (Perform the corresponding command or select the corresponding option)
ENTER (Perform the command for the active option or button)
SPACEBAR (Select or clear the check box if the active option is a check box)
Arrow keys (Select a button if the active option is a group of option buttons)
F1 key (Display Help)
F4 key (Display the items in the active list)
BACKSPACE (Open a folder one level up if a folder is selected in the Save As or Open dialogue box)
*Microsoft Natural Keyboard Shortcuts
Windows Logo (Display or hide the Start menu)
Windows Logo+BREAK (Display the System Properties dialogue box)
Windows Logo+D (Display the desktop)
Windows Logo+M (Minimize all of the windows)
Windows Logo+SHIFT+M (Restore the minimized windows)
Windows Logo+E (Open My Computer)
Windows Logo+F (Search for a file or a folder)
CTRL+Windows Logo+F (Search for computers)
Windows Logo+F1 (Display Windows Help)
Windows Logo+ L (Lock the keyboard)
Windows Logo+R (Open the Run dialogue box)
Windows Logo+U (Open Utility Manager)
*Accessibility Keyboard Shortcuts
Right SHIFT for eight seconds (Switch Filter Keys either on or off)
Left ALT+left SHIFT+PRINT SCREEN (Switch High Contrast either on or off)
Left ALT+left SHIFT+NUM LOCK (Switch the Mouse Keys either on or off)
SHIFT five times (Switch the Sticky Keys either on or off)
NUM LOCK for five seconds (Switch the Toggle Keys either on or off)
Windows Logo +U (Open Utility Manager)
*Windows Explorer Keyboard Shortcuts
END (Display the bottom of the active window)
HOME (Display the top of the active window)
NUM LOCK+Asterisk sign (*) (Display all of the sub folders that are under the selected folder)
NUM LOCK+Plus sign (+) (Display the contents of the selected folder)
NUM LOCK+Minus sign (-) (Collapse the selected folder)
LEFT ARROW (Collapse the current selection if it is expanded, or select the parent folder)
RIGHT ARROW (Display the current selection if it is collapsed, or select the first sub folder)
*Shortcut Keys for Character Map
After you double-click a character on the grid of characters, you can move through the grid by using the keyboard shortcuts:
RIGHT ARROW (Move to the right or to the beginning of the next line)
LEFT ARROW (Move to the left or to the end of the previous line)
UP ARROW (Move up one row)
DOWN ARROW (Move down one row)
PAGE UP (Move up one screen at a time)
PAGE DOWN (Move down one screen at a time)
HOME (Move to the beginning of the line)
END (Move to the end of the line)
CTRL+HOME (Move to the first character)
CTRL+END (Move to the last character)
SPACEBAR (Switch between Enlarged and Normal mode when a character is selected)
*Microsoft Management Console (MMC) Main Window Keyboard Shortcuts
CTRL+O (Open a saved console)
CTRL+N (Open a new console)
CTRL+S (Save the open console)
CTRL+M (Add or remove a console item)
CTRL+W (Open a new window)
F5 key (Update the content of all console windows)
ALT+SPACEBAR (Display the MMC window menu)
ALT+F4 (Close the console)
ALT+A (Display the Action menu)
ALT+V (Display the View menu)
ALT+F (Display the File menu)
ALT+O (Display the Favourites menu)
*MMC Console Window Keyboard Shortcuts
CTRL+P (Print the current page or active pane)
ALT+Minus sign (-) (Display the window menu for the active console window)
SHIFT+F10 (Display the Action shortcut menu for the selected item)
F1 key (Open the Help topic, if any, for the selected item)
F5 key (Update the content of all console windows)
CTRL+F10 (Maximize the active console window)
CTRL+F5 (Restore the active console window)
ALT+ENTER (Display the Properties dialogue box, if any, for the selected item)
F2 key (Rename the selected item)
CTRL+F4 (Close the active console window. When a console has only one console window, this shortcut closes the console)
*Remote Desktop Connection Navigation
CTRL+ALT+END (Open the Microsoft Windows NT Security dialogue box)
ALT+PAGE UP (Switch between programs from left to right)
ALT+PAGE DOWN (Switch between programs from right to left)
ALT+INSERT (Cycle through the programs in most recently used order)
ALT+HOME (Display the Start menu)
CTRL+ALT+BREAK (Switch the client computer between a window and a full screen)
ALT+DELETE (Display the Windows menu)
CTRL+ALT+Minus sign (-) (Place a snapshot of the active window in the client on the Terminal server clipboard and provide the same functionality as pressing
PRINT SCREEN on a local computer.)
CTRL+ALT+Plus sign (+) (Place a snapshot of the entire client window area on the Terminal server clipboard and provide the same functionality as pressing
ALT+PRINT SCREEN on a local computer.)
*Microsoft Internet Explorer Navigation
CTRL+B (Open the Organize Favourite dialogue box)
CTRL+E (Open the Search bar)
CTRL+F (Start the Find utility)
CTRL+H (Open the History bar)
CTRL+I (Open the Favourites bar)
CTRL+L (Open the Open dialogue box)
CTRL+N (Start another instance of the browser with the same Web address)
CTRL+O (Open the Open dialogue box, the same as CTRL+L)
CTRL+P (Open the Print dialogue box)
CTRL+R (Update the current Web page)
CTRL+W (Close the current window)
Restoring Windows Xp
Here i will tell you about the system restore tool, to restore your computer to a previous state. system restore takes a snapshot of critical system files, program files as well as the registry settings and stores this information as restore points for the operating system. Lets say you downloaded a piece of software from the Internet and you installed the software, only to discover the software has spy-ware or a virus, now your computer is running slow and you have pop ups appearing constantly. You can use the system restore points to recover your computer to a state before you installed the offending software. System restore can also change scripts, batch files and executable (exe) files on your computer.
[Note:]System restore will not delete any of your personal files, also system restore will not restore these files if they have been deleted. You must be logged on as an administrator to be able to use system restore.
*How to use System Restore
Just Log onto Windows as an Administrator.
Then Click start/all programs/accessories/system tools then select system restore.

In the welcome to system restore page, select restore my computer to an earlier time and click next.

In the select a restore point page, click the most recent system restore point from the, on this list, or select an earlier date from the, on this calendar, then click next.

Then A system restore message may appear which lists any configuration changes that system restore will make, click OK.
I the confirm restore point selection page, click next. System restore will then restore the previous windows configuration , and your computer will reboot.
Then Log onto the computer as administrator, the system restore, restoration complete page will be displayed.

After that Click OK.
If by any cause , if the system restore could not restore your computer to an earlier time, you then should try using system restore in safe mode. Some viruses and Trojans will prevent system restore from restoring your computer, using safe mode will prevent these from starting with your computer.
*Undoing a System Restore
Follow these steps.
First Log onto windows as an administrator.
Then Click start/all programs/accessories/system tools, then select system restore. On the welcome to system restore page, click undo my last restoration, then click next.
Then A system restore message may appear with a list of configuration changes that system restore will make, click OK.
In the confirm restoration undo page, click next. system restore will then restore your computer back to the original windows configuration and then reboot.
Then Log onto the computer as an administrator. the system restore undo complete page will appear.
After that Click OK.
The Windows Xp Interface

I know that all of you know the things that i am telling below...But i bet you will find atleast one that you dont know...
I. Screensaver Slideshow
Right-click the desktop, select properties> screen saver tab and pick my pictures slideshow in the drop down box. Click the settings button for the controlling options.
II. Stop Grouping similar Windows
Windows XP automatically groups similar entries on the task bar to aid readability. To turn this feature on or off, right-click the taskbar, select properties and then clear or tick Group Similar Taskbar Buttons.
III. Stop Auto- Arrange
By default all icons that appear on the desktop are automatically arranged and aligned to an invisible grid. For more control over the placement of your shortcuts, right-click the desktop, select Arrange icons By and then clear the Auto Arrange and Align to Grid settings.
IV. Universal Folder View
If you prefer to view all folders in the same way, set up one the way you like it, then select Tools> Folder Options. Switch to the View tab and click the Apply to All Folders button followed by OK to make the change universal.
V. Quick Launch
Right-click the taskbar and select Toolbars> Quick Launch to use the Quick Launch toolbar for placing convenient shortcuts to all your favourite programs.
VI. Make Your Taskbar Invisible
Taskbar to intrusive? Right-click it and choose properties, then select the Auto-Hide option to make it disappear. It’ll pop up whenever you drag your mouse to the bottom of the screen.
VII. Use The Address Bar
Why click Start > Run, when you can use the Address Toolbar instead? Right-click the taskbar and select Toolbars > Address. Right-click the Taskbar again and untick Lock the Taskbar to move or resize.
VIII. Toolbar Shortcut To Folder
Open My Computer and browse to the folder in question, then drag it to the left, right or top of the screen to convert it into a toolbar. Remove it by right-clicking and choosing close toolbar followed by OK.
IX. Change Colour Scheme
The default theme for Windows XP contains three colour schemes. To try one of the others, right-click the desktop, select Properties > Appearance tab and pick another shade under colour scheme.
X. No To All
Whenever your copying or moving files, you’ll sometimes be prompted for a “Yes” or a “Yes to All”. Choose the “Yes to All” option and similar files prompting the same question will be ignored in future. But what if you want “No to All” instead? There's no visible option, but hold the shift key as you click No to pick it.
XI. Individual Files
If you need to move or copy a large number of files from one folder to another, hold the Ctrl key down while you click on a number of files. They will all be selected.
XII. Select All Files
Select a block of consecutive files by clicking the first one, holding Shift and clicking the last.
XIII. Invert Selection
If you need to select the vast majority of files in a folder. try clicking the files you don't need then choosing Edit > Invert Selection.
XIV. Customize Explorer
Create more space in an explorer window by right-clicking its main toolbar and choosing Customize… You can add or remove items from the toolbar or use the text options and icon options drop-down menus to fine-tune the look of your toolbar.
XV. Resize Columns In Details Mode
Hold Ctrl + Alt and press the + key on the numeric keypad.
XVI. Use Send to
Click Start > Run, type sendto and press Enter to open the Send To folder; create shortcuts to folders you use a lot, then move or copy files quickly by right-clicking and choosing Send To.
XVII. Force Copy Or Move
By default, Windows copies items from one drive to another, but moves them if the file is going from one folder to another on the same drive. Holding Shift will ensure it’s moved , and holding Ctrl will ensure it’s copied.
XVIII. Improve Readability with clear type
Clear Type can be switched on or off by clicking the Effects button on the Appearance tab of the Desktop Properties Control Panel.
XIX. Clear Type Settings
Find out more about Clear Type or fine tune its settings at www.microsoft.com/typography/cleartype/ -to access the Web utility, click the ClearType Web interface link, and click yes when the security warning pops up.
XX. View Shortcuts
When you open a menu or My Computer window, you can view what shortcut keys are available by pressing Alt once, underlined letters will appear, and and pressing that letter will trigger the appropriate shortcut.
XXI. Shortcut View
Make these underlined letters appear automatically from the Appearance tab under the Desktop Control Panel. Click the Effects button and untick “Hide underlined letters for keyboard navigation until i press the Alt key”
XXII. No More Highlighting
Switch off the “highlight new programs” feature on the Start menu by right-clicking the Start button and selecting properties. Click Customize, switch to the advanced tab and untick “Highlight newly installed programs”.
XXIII. Pin An Item On The Start Menu
When you open the Start menu you’ll find the most accessed programs are listed in the left hand side. If you would like any to be permanently available just drag it above the thin dividing line so it sits with the Internet and Email shortcuts.
XXIV. Remove Pinned Items
Remove items from this list by right-clicking and choosing either unpin from Start menu or if you don’t want it to appear in the permanent list or most or most accessed list below it, Remove from this list.
XXV. Tweak Notification Area Icons
Right-click the taskbar and choose Properties, then click the Customize button. Click the appropriate icon’s entry under Behaviour and choose one of three options: Hide when inactive, Always hide, or Always show.
XXVI. Folder View
Right-click your folder, click Properties > Customize tab and choose a suitable template…
XXVII. Show Desktop
Click the show Desktop icon on the taskbar to minimise all running programs and display the Desktop. Click it again to restore the windows to their original configuration.
XXVIII. Control Panel View
If you cant find the Control Panel icon your looking for, by choosing Start > Control Panel, click Switch to classic view to list them all.
XXIX. Put Control Panels On The Start Menu
Alternatively, convert the Control Panel shortcut on the start menu into a cascading list of all Control Panels for direct access: Right-click the Start button and choose properties. click Customize > Advanced and select “"Display as a menu” under control panel. Click OK twice…
XXX. Move My Documents
If you have a second hard drive or partition, move your My Documents folder to keep it separate from windows. To do this, right-click the My Documents folder on your Desktop or in the Start Menu and choose Properties. Click Move, select a new location and choose Yes when asked if you want to move the files from their original location.
XXXI. Single Click Not Double Click
Open My Computer, choose tools > Folder Options > Settings tab > Single click to open an item.
XXXII. View File/Folder Properties
The quickest way to get a file or folder’s properties is to hold the Alt key as you double-click it.
XXXIII. Delete Immediately
Hold the Shift key as you drag a folder or file to the Recycle Bin to delete it instantly.
XXXIV. Folder Structure
Click the Folder button on a folder’s top tool bar to reveal where it sits in the folder structure of your hard drive.
XXXV. Folder Options
change the display options for any folder by opening it, and then using its View pull-down menu.
XXXVI. Tweak Start Menu
The Start menu contains shortcuts to the most recently accessed items. By default five are selected, but you can tweak this figure: right-click the Start button, then choose Properties and click customize, then alter the number on the General tab.
XXXVII. Putting The Start Menu In Order
Force the Start menu to automatically sort alphabetically with this tweak.
a. Open Registry Editor
Click start > Programs, right click any entry and choose Sort by Name. Click Start > Run, type regedit and press enter. Select the following key: HKEY_CURRENT_USER\Software\Microsoft\Windows\CurrentVersion\Explorer\MenuOrder.

b. Tweak Permissions
Choose Edit > Permissions, click Advanced and untick the”Inherit from parent the permission entries…” box. A pop-up box will appear, so click Copy followed by OK to return to the first screen.

c. Make Read-Only
Finally, select your username from the list and clear the Allow tick box next to Full Control (leave the Read tick box alone) and click Apply. Repeat for the Administrators group. Then click OK.
XXXVIII. 10 Windows Key Shortcuts
Shortcut Function
Win Opens the Start menu
Win + Pause/Break Access the system Control Panel
Win + D Minimise all windows to show the desktop. Press again to
restore the windows
Win + E Opens Windows Explorer at My Computer
Win + F Opens Windows Search
Win + L Return to the log-on screen (locks your PC if your user account is
password protected)
Win + R Open Start menu’s Run dialogue box
Win + U Utility Manager, a shortcut to controlling the Magnifier, Narrator,
and on screen Keyboard
Win + F1 Open Help and Support Centre
Win + Tab Cycle through open windows on the Taskbar
XXXIX. Use Keyboard Instead Of Mouse
If your mouse stops working, you can use the numeric keypad instead by switching on MouseKeys. Hold the left Alt and Shift keys together and press Numlock. If the movement is too slow, press the keys together again to disable MouseKeys, then press them again, But this time click settings twice to change them before switching the feature on.
XXXX. Instant Access To The Entire PC
Put the entire contents of your PC on to your Taskbar for easy access. Right-click the Taskbar and choose Toolbars > New Toolbar… Select My Computer and click OK. Use the new Toolbar’s handle ( you may need to unlock the Taskbar first) to shorten it so that only My Computer and a double arrow are visible. Lock your Taskbar if possible and click the double-arrow to reveal your computers contents via a series of cascading menus.
Google Secret Searches


With All The Ease, We Can Tell That Google Is The Starting And Final Word For Internet Search
But most people don't use it to its best advantage. Do you just type in a keyword or two and hope for the best? This may be the quickest and simplest way to search, but with more than 3 billion pages in Google's index, there's an easier way to get the results to a manageable number.
Google is a powerful tool which eases and enhances your Internet exploring. Google's search options go beyond simple keywords, the Web, and even its own programmers. Let's look at some of Google's lesser-known options.
A)Syntax Search Tricks
Using a special syntax is a way to tell Google that you want to restrict your searches to certain elements or characteristics of Web pages. Google has a fairly complete list of its syntax elements at
www.google.com/help/operators.html
Here are some advanced operators that can help narrow down your search results.
Intitle: placed at the beginning of a query word or phrase (intitle:"Google search") restricts your search results to just the titles of the Web pages.
Intext: does the opposite of intitle:, searching only the body text, ignoring titles, links, and so forth. Intext: is perfect when what you're searching for might commonly appear in URLs. If you're looking for the term HTML, for example, and you don't want to get results such as
www.mysite.com/index.html
you can enter intext:html.
Link: lets you see which pages are linking to your Web page or to another page you're interested in. For example, try typing in
link:http://www.pcmag.com
Try using site: (which restricts results to top-level domains) with intitle: to find certain types of pages. For example, get scholarly pages about your favourite author by searching for intitle:"favourite author"site:edu.
Experiment with mixing various elements; you'll develop several strategies for finding the stuff you want more effectively.
The site: command is very helpful as an alternative to the mediocre search engines built into many sites.
Google has a number of services that can help you accomplish tasks you may never have thought to use Google for. For example, the new calculator feature
(www.google.com/help/features.html#calculator)
lets you do both math and a variety of conversions from the search box.
Google can help you find out if you've got the right spelling—and the right word—for your search. Enter a misspelled word or phrase into the query box (try "gougle serch") and Google may suggest a proper spelling. This doesn't always work; it works best when the word you're searching for can be found in a dictionary. Once you search for a properly spelled word, look at the results page, which repeats your query. (If you're searching for "Google search," underneath the search window will appear a statement such as Searched the web for "Google search.") You'll discover that you can click on each word in your search phrase and get a definition from a dictionary.
Lets say you want to contact someone and don't have the phone number handy. Google can help you with that, too. Just enter a name, city, and state. (The city is optional, but you must enter a state.) If a phone number matches the listing, you'll see it at the top of the search results along with a map link to the address.
B)Extended Googling
Google offers several services that give you a head start in focusing your search. Google Groups
indexes literally millions of messages from decades of discussion on Usenet. Google even helps you with your shopping via two tools: Froogle
(http://froogle.google.com),
which indexes products from online stores, and Google Catalogs
(http://catalogs.google.com),
which features products from more 6,000 paper catalogs in a searchable index. And this only scratches the surface. You can get a complete list of Google's tools and services at
(www.google.com/options/index.html)
You've probably already gotten used to using Google in your browser. But have you ever thought of using Google outside of your browser?
C)Google Alert
Google alert monitors your search terms and e-mails you information about new additions to Google's Web index. (Google Alert is not affiliated with Google; it uses Google's Web services API to perform its searches.) If you're more interested in news stories than general Web content, check out the beta version of Google News Alerts
This service (which is affiliated with Google) will monitor up to 50 news queries per e-mail address and send you information about news stories that match your query. (Hint: Use the intitle: and source: syntax elements with Google News to limit the number of alerts you get.)
Google on the telephone? This service is brought to you by Google Labs
a place for experimental Google ideas and features (which may come and go, so what's there at this writing might not be there when you decide to check it out). With Google Voice Search you dial the Voice Search phone number, speak your keywords, and then click on the indicated link. Every time you say a new search term, the results page will refresh with your new query (you must have JavaScript enabled for this to work). Remember, this service is still in an experimental phase, so don't expect 100 percent success.
In 2002, Google released the Google API (application programming interface), this is a way for programmers to access Google's search engine results without violating the Google Terms of Service. A lot of people have created useful applications not available from Google itself, such as Google Alert. For many applications, you'll need an API key, which is available free from
(www.google.com/apis)
Computer Acronyms
A
ADSL - Asymmetric Digital Subscriber Line
AGP - Accelerated Graphics Port
ALI - Acer Labs, Incorporated
ALU - Arithmetic Logic Unit
AMD - Advanced Micro Devices
APC - American Power Conversion
ASCII - American Standard Code for Information Interchange
ASIC - Application Specific Integrated Circuit
ASPI - Advanced SCSI Programming Interface
AT - Advanced Technology
ATI - ATI Technologies Inc.
ATX - Advanced Technology Extended
B
BFG - BFG Technologies
BIOS - Basic Input Output System
BNC - Barrel Nut Connector
C
CAS - Column Address Signal
CD - Compact Disk
CDR - Compact Disk Recorder
CDRW - Compact Disk Re-Writer
CD-ROM - Compact Disk - Read Only Memory
CFM - Cubic Feet per Minute (ft�/min)
CMOS - Complementary Metal Oxide Semiconductor
CPU - Central Processing Unit
CTX - CTX Technology Corporation (Committed to Excellence)
D
DDR - Double Data Rate
DDR-SDRAM - Double Data Rate - Synchronous Dynamic Random Access Memory
DFI - DFI Inc. (Design for Innovation)
DIMM - Dual Inline Memory Module
DRAM - Dynamic Random Access Memory
DPI - Dots Per Inch
DSL - See ASDL
DVD - Digital Versatile Disc
DVD-RAM - Digital Versatile Disk - Random Access Memory
E
ECC - Error Correction Code
ECS - Elitegroup Computer Systems
EDO - Extended Data Out
EEPROM - Electrically Erasable Programmable Read-Only Memory
EPROM - Erasable Programmable Read-Only Memory
EVGA - EVGA Corporation
F
FC-PGA - Flip Chip Pin Grid Array
FDC - Floppy Disk Controller
FDD - Floppy Disk Drive
FPS - Frame Per Second
FPU - Floating Point Unit
FSAA - Full Screen Anti-Aliasing
FS - For Sale
FSB - Front Side Bus
G
GB - Gigabytes
GBps - Gigabytes per second or Gigabits per second
GDI - Graphical Device Interface
GHz - GigaHertz
H
HDD - Hard Disk Drive
HIS - Hightech Information System Limited
HP - Hewlett-Packard Development Company
HSF - Heatsink-Fan
I
IBM - International Business Machines Corporation
IC - Integrated Circuit
IDE - Integrated Drive Electronics
IFS- Item for Sale
IRQ - Interrupt Request
ISA - Industry Standard Architecture
ISO - International Standards Organization
J
JBL - JBL (Jame B. Lansing) Speakers
JVC - JVC Company of America
K
Kbps - Kilobits Per Second
KBps - KiloBytes per second
L
LG - LG Electronics
LAN - Local Are Network
LCD - Liquid Crystal Display
LDT - Lightning Data Transport
LED - Light Emitting Diode
M
MAC - Media Access Control
MB - Motherboard or Megabyte
MBps - Megabytes Per Second
Mbps - Megabits Per Second or Megabits Per Second
MHz - MegaHertz
MIPS - Million Instructions Per Second
MMX - Multi-Media Extensions
MSI - Micro Star International
N
NAS - Network Attached Storage
NAT - Network Address Translation
NEC - NEC Corporation
NIC - Network Interface Card
O
OC - Overclock (Over Clock)
OCZ - OCZ Technology
OEM - Original Equipment Manufacturer
P
PC - Personal Computer
PCB - Printed Circuit Board
PCI - Peripheral Component Interconnect
PDA - Personal Digital Assistant
PCMCIA - Peripheral Component Microchannel Interconnect Architecture
PGA - Professional Graphics Array
PLD - Programmable Logic Device
PM - Private Message / Private Messaging
PnP - Plug 'n Play
PNY - PNY Technology
POST - Power On Self Test
PPPoA - Point-to-Point Protocol over ATM
PPPoE - Point-to-Point Protocol over Ethernet
PQI - PQI Corporation
PSU - Power Supply Unit
R
RAID - Redundant Array of Inexpensive Disks
RAM - Random Access Memory
RAMDAC - Random Access Memory Digital Analogue Convertor
RDRAM - Rambus Dynamic Random Access Memory
ROM - Read Only Memory
RPM - Revolutions Per Minute
S
SASID - Self-scanned Amorphous Silicon Integrated Display
SCA - SCSI Configured Automatically
SCSI - Small Computer System Interface
SDRAM - Synchronous Dynamic Random Access Memory
SECC - Single Edge Contact Connector
SODIMM - Small Outline Dual Inline Memory Module
SPARC - Scalable Processor Architecture
SOHO - Small Office Home Office
SRAM - Static Random Access Memory
SSE - Streaming SIMD Extensions
SVGA - Super Video Graphics Array
S/PDIF - Sony/Philips Digital Interface
T
TB - Terabytes
TBps - Terabytes per second
Tbps - Terabits per second
TDK - TDK Electronics
TEC - Thermoelectric Cooler
TPC - TipidPC
TWAIN - Technology Without An Important Name
U
UART - Universal Asynchronous Receiver/Transmitter
USB - Universal Serial Bus
UTP - Unshieled Twisted Pair
V
VCD - Video CD
VPN - Virtual Private Network
W
WAN - Wide Area Network
WTB - Want to Buy
WYSIWYG - What You See Is What You Get
X
XGA - Extended Graphics Array
XFX - XFX Graphics, a Division of Pine
XMS - Extended Memory Specification
XT - Extended Technology


